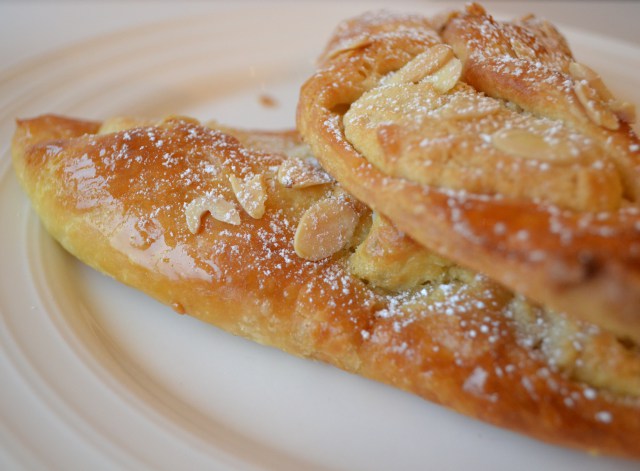
There is something about autumn and winter that makes me want to cook and bake. I don’t know if it is some instinctive desire to squirrel away food for the cold months ahead or whether it is just the lovely comforting feeling of standing in a warm cosy kitchen whilst the rain hammers against the fogged up window but I find myself wanting to cook not just for today but for the days and weeks ahead. I had been meaning to try out this recipe from Nigella’s Domestic Goddess for as long as I have owned the book…which is quite a while now…and last weekend was just the right time for it. The recipe suggests halving the dough mixture and freezing one half and using the remainder to make 6 pastries and that’s exactly what I did.
On reflection it is quite a simple recipe but the process is long and requires a bit of time and resting, especially first time around, but I can tell you that it was really worth the effort. It is hard at one point to imagine that the gooey sticky dough will ever amount to anything more than a disaster but miraculously it does. I was tempted, just before the finish line, to skip the second last step of brushing them with a sugar glaze but I’m glad I did as this really gives them that beautiful shiny sticky finish. I did however skip the final step of drizzling with a runny icing sugar glaze as we wanted to eat them just a little bit warm…in truth we couldn’t wait any longer! They smell wonderful and are surprisingly light and soft and much better than many shop bought ones I have sampled which can sometimes feel a little heavy and stale. I am quite happy now with the knowledge that I have the remaining dough tucked away ready to be defrosted and made in lovely pastries in no time.
One important thing to note before you get started is that the initial dough needs to be rested in the fridge overnight so you need to start this process the day before you want to bake the pastries.
For the pastry:
- 60ml warm water
- 125ml milk, at room temperature
- 1 large egg, at room temperature
- 350g white bread flour
- 1 sachet or 7g easy blend yeast
- 1 teaspoon of salt
- 25g caster sugar
- 250g unsalted cold butter, cut in to roughly 1cm slices
For the almond filling:
- 150g ground almonds
- 80g icing sugar
- 2 tablespoons soft unsalted butter
- 1 teaspoon of almond extract
- 1 large egg white, beaten lightly
- A handful of flaked almonds
For egg glaze:
- 1 large egg beaten with 2 tablespoons of milk
For the clear glaze:
- 80g caster sugar mixed with 100ml of water, heated until the sugar dissolves and the glaze thickens slightly.
Weigh out all of your ingredients and have everything ready to go.
Pour the milk, water and egg in to a jug and beat with a fork to mix, then leave to one side.
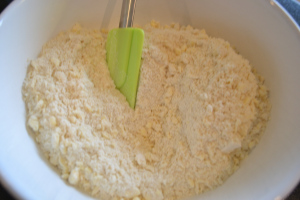
Put the flour, yeast, salt and sugar in to a food processor and pulse once or twice to mix. Add in the slices of butter and pulse again briefly just so that the butter is cut up a little – you should still see chunks of it in the mix – then empty the flour mix in to a large bowl.
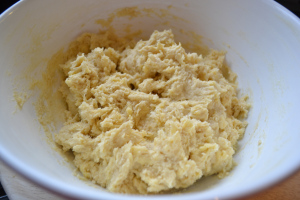
Quickly add in the milk/water/egg mixture and fold the ingredients together using a spatula – don’t overdo it, mix gently and just enough to combine all of the flour with the liquid but you should have a gooey sticky dough with butter lumps still showing. Cover the bowl with clingfilm and put it in the fridge overnight.
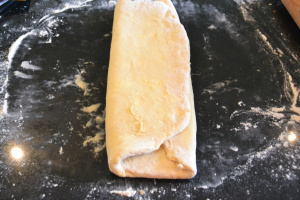
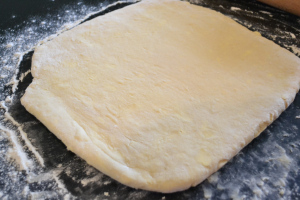
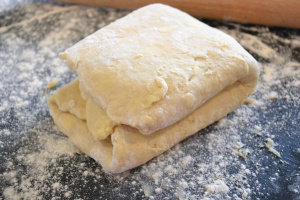
Next day remove the dough from the fridge and leave it to return to room temperature. Flour your work surface and roll the dough – the first time you try to roll the dough out it will be really sticky and prove quite difficult. Once you have a rough square of approx. 50cm by 50cm fold the dough in to thirds by folding the right side over, then the left as you would a letter.
Fold the dough over in half, flour your surface and rolling pin and roll out again to a rough square of around 50cm by 50cm – you will notice that now the dough is starting to look and act a bit more like pastry and it becomes quite pillowy. If you look closely at the picture below you can still see lumps of butter in the pastry.
Again fold the dough in to three and then over in half and repeat this three times.
On the final folding don’t fold over in half at the end but cut the pastry in two. Wrap both in clingfilm and if freezing one then place in a freezer bag and put in the freezer – alternatively you can store in the fridge for up to 4 days. Place the other wrapped half that you intend to bake now in the fridge for 30 minutes.
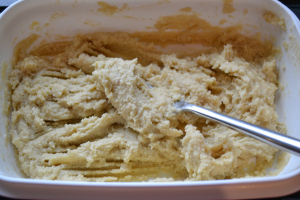
Whilst the dough is in the fridge make the almond filling by mixing the ground almonds, icing sugar, butter, almond extract and two tablespoons of the egg white together in a bowl or food processor.
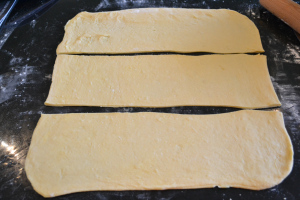
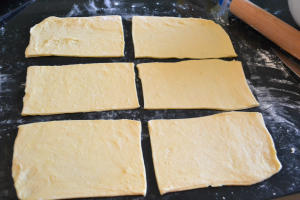
Remove the pastry from the fridge and roll out again in to a large square and then cut horizontally across in to three equal pieces.
And then cut in half down the middle to give 6 rough (very rough in this case) squares.
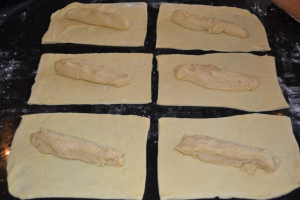
Now shape equal amounts of almond mixture in to sausage shapes and place diagonally across each of the pastries.
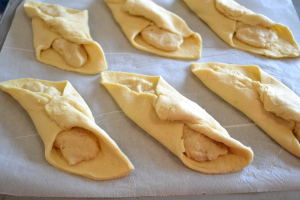
Now take the two opposite corners of each pastry that are each side of the almond filling and bring them together, pinching slightly and then folding over to tuck the fold in. Place on a lined baking sheet, brush with the egg glaze, sprinkle with some flaked almonds and then leave at room temperature for around an hour and a half – now the recipe said until they double in size and whilst mine rose a little they certainly didn’t double in size but I still had lovely light pastries. At this stage they look a little limp and scruffy.
Meanwhile preheat the oven to 160ºC (180ºC for non fan ovens) and when ready to bake place in the oven and cook for around 20 minutes until lovely and golden.
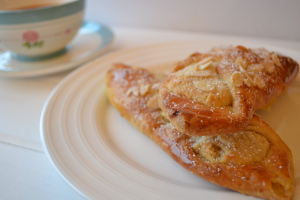
Transfer to a wire rack and allow to cool slightly before brushing with the clear glaze. Dust lightly with icing sugar and enjoy with a nice cuppa whilst still warm.
If you have any left over you can wrap in parchment and store in an airtight container until the next day – just pop in to the oven preheated to 160º to warm though a little.

Almond pastries are my favourite kind – hats off to you for making your own! Pastry is definitely not my forte in the kitchen.
Mine too! Love them but with the other half of the pastry I think I will try apple :) I was so pleased these turned out well – believe me I’m not great with pastry either but this is really quite forgiving and I think once I get familiar with the process and resting times it will become quite simple! Have a go – you’ll be really surprised :)
How brave of you to make your own pastries. I watched as they made them on the Great British Bakeoff and marvelled at the time and skill involved. Congrats on having yours turn out so well. It must be lovely to have some just waiting in the freezer :-)
Hi Sharon :) I don’t recall seeing them in this years GBBO! Perhaps if I did I might have been turned off so it’s just as well. Believe me if I can make these then anyone can – I’m really not at all skilled when it comes to baking or pasty and this is a really simple, if a little time consuming, recipe.
Oh wow, they look incredible!
Hi Breige! Thanks so much :) I was delighted with how these turned out x
My favourite! Those look beyond delicious. I can’t wait to try them.
Juliet
Hi Juliet – thank you for the lovely comment :) they are so scrummy – worth the effort!
They look fantastic!!! Also, you made making the pastry seem really easy, totally attempting to bake them :)